

Introduction
Cloud cakes are the epitome of lightness and indulgence, offering a dessert experience that feels almost ethereal. Imagine biting into a slice of pure fluffiness—each bite melting in your mouth with just the right balance of sweetness and airiness. This heavenly treat has captured the hearts (and taste buds) of bakers and dessert lovers alike, thanks to its simple ingredients and surprisingly easy preparation process. Whether you’re a seasoned baker or just starting out, mastering the art of making cloud cake is an achievement worth celebrating. In this guide, we’ll walk you through every step of creating the perfect cloud cake, from whipping up those delicate egg whites to achieving that irresistible texture. So grab your mixing bowls and get ready to elevate your baking game with this ultimate beginner-friendly recipe!
Understanding the Basics of Cloud Cake
What Makes a Cloud Cake Unique?
Cloud cakes are unlike any other dessert you’ve tried before. Their name perfectly captures their essence—light, airy, and almost weightless in texture. But what exactly makes them so unique? Let’s break it down:
- Meringue-Based Structure :
At its core, a cloud cake relies heavily on meringue, which is created by whipping egg whites until they form stiff peaks. This process incorporates air into the mixture, giving the cake its signature fluffiness. The science behind meringue is fascinating—it involves proteins in egg whites bonding together to trap tiny bubbles of air, creating a stable foam. - Minimal Ingredients for Maximum Impact :
Unlike traditional cakes that require flour, butter, or oil, cloud cakes use just a handful of ingredients. Typically, all you need are egg whites, sugar, cream of tartar (to stabilize the meringue), and sometimes condensed milk for added richness. This simplicity not only makes the recipe approachable for beginners but also allows the delicate flavors to shine through. - Airy Texture That Melts in Your Mouth :
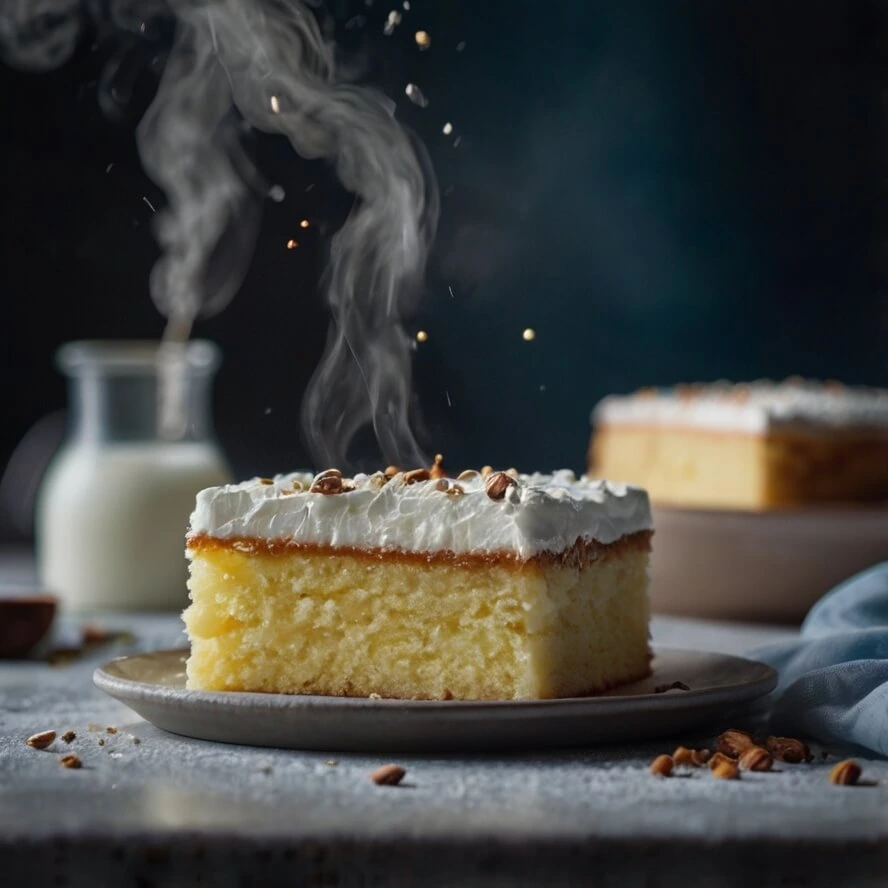
The defining feature of a cloud cake is its unparalleled lightness. When baked correctly, it achieves a texture that feels like biting into a cloud—soft, pillowy, and oh-so-satisfying. This texture comes from the careful folding of whipped egg whites into the batter, ensuring the air trapped within remains intact during baking. - Versatility in Flavor and Presentation :
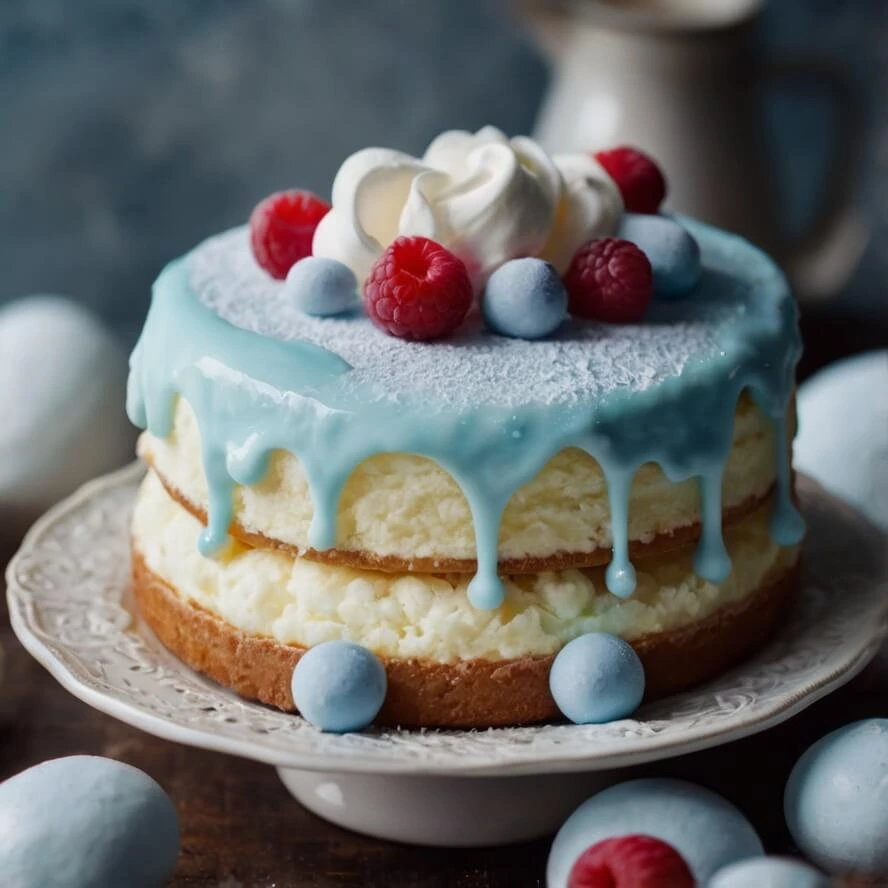
While the base recipe is simple, cloud cakes offer endless opportunities for customization. You can add natural flavorings like vanilla extract, cocoa powder, or even fruit purees to create unique variations. For presentation, top your cloud cake with fresh fruits, chocolate drizzle, or a dusting of powdered sugar to make it look as stunning as it tastes.
In short, cloud cakes stand out because of their simplicity, impressive texture, and versatility. Whether you’re looking for a quick dessert or something special to impress guests, this recipe delivers every time. With just a little practice, you’ll be able to master the art of crafting these delightful treats!
Key Ingredients in a Cloud Cake Recipe
A cloud cake may seem like a simple dessert, but its success lies in the careful selection and handling of its key ingredients. Each ingredient plays a crucial role in achieving the light, airy texture and delicate sweetness that define this heavenly treat. Let’s take a closer look at what goes into making a cloud cake:
- Egg Whites – The Foundation of Fluffiness :
Egg whites are the star of the show when it comes to cloud cakes. They provide the structure and airiness by forming stiff peaks when whipped. It’s important to use fresh eggs for better results, as fresher egg whites hold their shape more effectively. Additionally, ensure your mixing bowl and whisk are completely grease-free, as even the tiniest bit of oil can prevent the whites from whipping properly. - Sugar – For Sweetness and Stability :
Sugar not only adds sweetness but also helps stabilize the meringue. When added gradually while whipping the egg whites, sugar dissolves into the mixture, creating a glossy, firm texture. For a healthier option, you can substitute regular granulated sugar with alternatives like powdered stevia or erythritol, though these may slightly alter the final texture. - Cream of Tartar – The Secret Stabilizer :
Cream of tartar is a magical ingredient that enhances the stability of the meringue. By lowering the pH level of the egg whites, it strengthens the protein bonds, helping the mixture maintain its volume and stiffness. If you don’t have cream of tartar on hand, lemon juice or white vinegar can serve as substitutes, though they might impart a slight tangy flavor. - Condensed Milk – Optional Enrichment :
While not strictly necessary, sweetened condensed milk is often used in cloud cake recipes to add moisture, richness, and extra sweetness. It gives the cake a denser yet still fluffy texture. If you’re looking for a lighter version or want to reduce calories, you can skip the condensed milk or replace it with a dairy-free alternative like coconut cream. - Optional Flavor Enhancers :
To elevate your cloud cake, consider adding flavor enhancers such as vanilla extract, cocoa powder, matcha powder, or fruit purees. These additions allow you to customize the taste to suit your preferences. For example, a hint of vanilla brings warmth, while cocoa powder transforms the cake into a decadent chocolate cloud. - Toppings and Garnishes :
Although not part of the core recipe, toppings play a significant role in enhancing both the appearance and flavor of your cloud cake. Popular choices include fresh berries, whipped cream, chocolate shavings, or a sprinkle of powdered sugar. These finishing touches make the cake visually appealing and irresistible.
By understanding the role of each ingredient, you’ll be better equipped to troubleshoot common issues and experiment with variations. Remember, precision matters—measure carefully and handle the ingredients gently to preserve the delicate texture of your cloud cake.
Tools You’ll Need for Baking Success
Baking a cloud cake requires precision and the right tools to ensure success. While the recipe itself is simple, having the correct equipment will help you achieve that signature light, airy texture every time. Here’s a list of the essential tools you’ll need, along with tips on how to use them effectively:
- Electric Mixer or Hand Whisk
A handheld or stand mixer is indispensable for whipping egg whites to stiff peaks. If you don’t have access to an electric mixer, a sturdy hand whisk can work too, though it will require more elbow grease. The key is to whip the egg whites long enough to incorporate air and create a stable foam. Ensure your whisk or mixer attachments are clean and free of grease, as any oil residue can prevent the whites from reaching their full volume. - Mixing Bowls
Use two mixing bowls—one for separating the egg whites from the yolks and another for whipping the whites. Stainless steel or glass bowls are ideal because they retain cold temperatures better, which helps in achieving stiff peaks faster. Avoid plastic bowls, as they can retain grease even after washing. - Spatula (Rubber or Silicone)
A spatula is essential for gently folding the sugar and other ingredients into the whipped egg whites without deflating the mixture. Silicone spatulas are particularly useful as they’re flexible and non-stick, allowing you to scrape every last bit of batter from the bowl. - Oven-Safe Dish or Cake Pan
Since cloud cakes are often baked in shallow dishes or pans, choose one that suits the size of your recipe. A square or rectangular baking dish works well, but you can also use individual ramekins for portioned servings. Line the dish with parchment paper if needed to prevent sticking, especially if the recipe doesn’t call for greasing the pan. - Measuring Cups and Spoons
Accurate measurements are crucial in baking. Use dry measuring cups for flour and sugar substitutes (if using), and liquid measuring cups for condensed milk or flavorings. Measuring spoons are handy for adding cream of tartar, vanilla extract, or other small quantities of ingredients. - Cooling Rack
After baking, transfer the cloud cake to a cooling rack to prevent condensation from forming underneath, which could make the bottom soggy. Letting it cool completely ensures the cake retains its structure before serving or storing. - Optional Tools
- Kitchen Scale : For precise measurements, especially when experimenting with variations like gluten-free or low-calorie recipes.
- Pastry Brush : To clean the edges of the baking dish or apply a thin layer of oil (if necessary).
- Piping Bag : For creating decorative shapes or patterns with the batter before baking.
Having the right tools at hand not only simplifies the process but also improves your chances of baking a flawless cloud cake. Remember, preparation is key—gather all your tools beforehand to streamline the steps and focus on achieving perfection.
Step-by-Step Guide to Making Cloud Cake
Preparing Your Ingredients
Proper preparation of your ingredients is the foundation for baking a successful cloud cake. This step ensures that everything is ready to go when you begin mixing, which minimizes errors and maximizes efficiency. Here’s a breakdown of how to prepare each ingredient for optimal results:
- Separating Egg Whites from Yolks
One of the most critical steps in making a cloud cake is separating the egg whites from the yolks. Even the tiniest bit of yolk can prevent the egg whites from whipping properly. To avoid contamination, crack each egg into a small bowl before transferring the white to your mixing bowl. This way, if one egg gets broken improperly, it won’t ruin the entire batch. For best results, use eggs that are at room temperature, as they whip better than cold ones. - Measuring Sugar Precisely
Sugar plays a dual role in cloud cakes—it adds sweetness and helps stabilize the meringue. Measure the sugar carefully using either a scale or measuring cups. If substituting with alternatives like powdered stevia or erythritol, follow the conversion ratios provided on the packaging to maintain the right texture. Gradually add the sugar while whipping the egg whites to ensure it dissolves completely, resulting in a smooth and glossy mixture. - Adding Cream of Tartar Thoughtfully
Cream of tartar is a stabilizing agent that helps the egg whites hold their shape and volume. Add it early in the process—just after starting to whip the egg whites but before adding the sugar. A pinch (about 1/8 teaspoon per egg white) is all you need. If you don’t have cream of tartar, substitute it with a small amount of lemon juice or white vinegar, though these may slightly alter the flavor. - Condensed Milk Preparation (If Using)
Sweetened condensed milk is often used in cloud cake recipes to add moisture and richness. Before incorporating it into the batter, make sure it’s at room temperature so it blends smoothly without deflating the whipped egg whites. If you’re substituting with coconut cream or another alternative, warm it slightly to achieve the same consistency. - Optional Flavorings
If you plan to add flavorings such as vanilla extract, cocoa powder, or fruit purees, measure them out beforehand. Vanilla extract should be added toward the end of the mixing process, while cocoa powder or fruit purees can be folded in gently after the sugar has been incorporated. Be mindful of quantities; too much liquid can weigh down the delicate meringue. - Final Checks Before Mixing
Once all your ingredients are prepared, double-check that they’re measured correctly and within reach. This minimizes interruptions during the mixing process, which is crucial since overmixing or letting the egg whites sit too long can cause them to lose air and deflate. Having everything prepped ahead of time allows you to focus on achieving the perfect texture.
By taking the time to properly prepare your ingredients, you set yourself up for success in creating a light, fluffy cloud cake. Remember, attention to detail at this stage pays off in the final product, ensuring your dessert turns out as heavenly as its name suggests.
Whipping Egg Whites to Perfection
Whipping egg whites is one of the most crucial steps in making a cloud cake. The success of your cake depends on how well you whip those egg whites, as they are responsible for creating the light, airy texture that defines this dessert. Follow these step-by-step instructions and tips to achieve stiff, glossy peaks every time:
- Start with Fresh, Cold Eggs
Begin by separating the egg whites from the yolks while the eggs are cold. This makes it easier to separate them cleanly. However, once separated, let the egg whites come to room temperature before whipping. Warmer egg whites whip better and hold more air, resulting in a fluffier texture. - Use a Clean Mixing Bowl
Ensure your mixing bowl and whisk attachments are completely clean and free of any grease or residue. Even a tiny amount of oil or yolk can prevent the egg whites from reaching their full volume. Stainless steel or glass bowls work best because they don’t retain oils like plastic bowls might. - Begin Slowly, Then Increase Speed
Start whipping the egg whites on low speed to break them down and incorporate air gradually. Once they begin to foam, increase the speed to medium-high. This gradual approach helps build stable bubbles within the mixture, leading to a stronger structure. - Add Cream of Tartar Early
Add a pinch of cream of tartar (about 1/8 teaspoon per egg white) at the beginning of the whipping process. Cream of tartar stabilizes the egg whites, helping them hold their shape and volume. If you don’t have cream of tartar, a small squeeze of lemon juice or a dash of white vinegar can serve as substitutes. - Gradually Add Sugar
Once the egg whites start forming soft peaks, begin adding sugar gradually, about one tablespoon at a time. Adding sugar too quickly can weigh down the mixture and prevent it from reaching stiff peaks. Continue whipping until the sugar is fully dissolved and the mixture becomes glossy and firm. - Check for Stiff Peaks
To test if your egg whites are ready, lift the whisk out of the bowl. The peaks should stand straight up without drooping. If the peaks are still soft or collapse, continue whipping for a few more seconds. Be careful not to overwhip, as this can cause the mixture to become grainy and lose its volume. - Avoid Overmixing
While it’s important to whip the egg whites thoroughly, overmixing can lead to dryness and loss of air. Stop as soon as you achieve stiff, glossy peaks. If you accidentally overwhip the egg whites, you can try saving them by gently folding in a tablespoon of unwhipped egg whites to restore some moisture. - Troubleshooting Tips
- Egg whites won’t whip? Double-check that your bowl and tools are grease-free. You can also add a tiny bit of acid (like cream of tartar or lemon juice) to help stabilize the mixture.
- Mixture looks curdled? This could happen if the sugar isn’t fully dissolved. Keep whipping for a minute longer to smooth it out.
By mastering the art of whipping egg whites, you lay the foundation for a perfect cloud cake. Remember, patience and precision are key—take your time and watch as your egg whites transform into a fluffy, billowy mixture that will elevate your dessert to new heights.
Folding in the Sugar and Cream of Tartar
Once your egg whites are whipped to perfection, the next step is carefully incorporating the sugar and cream of tartar (if not already added during the whipping process). This step requires a gentle touch to preserve the airiness of the meringue while ensuring the sugar dissolves fully. Here’s how to do it correctly:
- Gradual Addition of Sugar
Adding sugar too quickly can deflate the whipped egg whites, so it’s essential to incorporate it gradually. Begin by sprinkling about one tablespoon of sugar at a time into the bowl while continuing to whip on medium speed. Allow each addition to dissolve completely before adding more. This gradual approach ensures that the sugar integrates smoothly without weighing down the mixture. - The Role of Cream of Tartar
If you haven’t already added cream of tartar earlier in the process, now is the time to include it. A pinch of cream of tartar (about 1/8 teaspoon per egg white) helps stabilize the meringue and enhances its structure. Add it along with the first few tablespoons of sugar to ensure even distribution throughout the mixture. - Using the Folding Technique
After all the sugar has been incorporated, switch from whipping to folding. Use a rubber or silicone spatula to gently fold the mixture in a cutting motion. Cut through the center of the bowl, then scrape along the sides and bottom, bringing the mixture back up toward the center. Rotate the bowl slightly with each stroke to ensure even incorporation. Avoid stirring or overmixing, as this can deflate the air bubbles trapped within the meringue. - Checking for Glossiness and Firmness
As you fold, keep an eye on the texture of the mixture. The finished product should be glossy, smooth, and hold stiff peaks when lifted with the spatula. If the mixture feels grainy, continue folding gently until the sugar is fully dissolved. To test, rub a small amount between your fingers—it should feel completely smooth. - Avoiding Common Mistakes
- Overmixing: Be cautious not to overwork the mixture, as this can cause the meringue to lose volume and become dense. Fold just enough to combine the ingredients evenly.
- Undissolved Sugar: If the sugar hasn’t dissolved properly, the meringue may feel gritty. Keep folding gently until the mixture becomes silky and smooth.
- Final Touches Before Proceeding
Once the sugar and cream of tartar are fully incorporated, give the mixture one last check for consistency. It should be light, fluffy, and retain its shape when scooped. At this point, you can proceed to add any optional flavorings or ingredients, such as vanilla extract or cocoa powder, using the same gentle folding technique.
By mastering the art of folding in sugar and cream of tartar, you ensure that your cloud cake batter retains its delicate airiness while gaining the necessary sweetness and stability. This step is crucial for achieving the signature texture of a cloud cake—light, soft, and melt-in-your-mouth delicious.
Adding Flavor Enhancers (Optional)
While the classic cloud cake is delightful on its own, adding flavor enhancers can take your dessert to the next level. These optional ingredients allow you to customize the taste and aroma of your cake, making it uniquely yours. However, when incorporating flavors, it’s important to do so gently to avoid deflating the airy meringue structure. Here’s how to add flavor enhancers successfully:
- Vanilla Extract – A Warm and Cozy Touch
Vanilla extract is one of the simplest yet most effective ways to enhance the flavor of your cloud cake. Use pure vanilla extract for the best results, as imitation extracts can have a harsh or artificial taste. Add about ½ to 1 teaspoon of vanilla extract toward the end of the mixing process, folding it in gently to preserve the airiness of the batter. - Cocoa Powder – For Chocolate Lovers
Transform your cloud cake into a decadent chocolate treat by adding unsweetened cocoa powder. Sift the cocoa powder before adding it to prevent lumps from forming. Start with 1–2 tablespoons and fold it in carefully. Keep in mind that cocoa powder absorbs moisture, so you may need to adjust the amount of condensed milk or liquid ingredients slightly to maintain the right consistency. - Matcha Powder – A Trendy Twist
Matcha powder adds a vibrant green color and earthy, slightly sweet flavor to your cloud cake. Like cocoa powder, matcha should be sifted before use to ensure smooth incorporation. Begin with 1–2 teaspoons and fold it in gently. Matcha pairs beautifully with a hint of vanilla or even a splash of almond extract for added depth. - Fruit Purees – Fresh and Fruity Flair
Incorporating fruit purees like strawberry, raspberry, or mango can infuse your cloud cake with natural sweetness and tanginess. Use about 2–3 tablespoons of puree, depending on the intensity of flavor you desire. Be cautious not to add too much liquid, as this can weigh down the meringue. Fold the puree in gently, ensuring it’s evenly distributed without overmixing. - Spices and Zest – For a Unique Kick
Experiment with spices like cinnamon, nutmeg, or cardamom for a warm, aromatic twist. A pinch of these spices goes a long way, so start small and adjust to taste. Lemon or orange zest can also add brightness and freshness. Grate the zest finely and fold it in at the end to avoid deflating the mixture. - Tips for Successful Flavor Addition
- Add Toward the End: Always add flavor enhancers after the egg whites are fully whipped and sugar is incorporated. This minimizes the risk of deflating the meringue.
- Fold Gently: Use a light hand when folding in flavorings to retain the airiness of the batter. Avoid stirring or overmixing, which can cause the cake to lose its fluffy texture.
- Test Before Committing: If experimenting with new flavors, start with small amounts and taste as you go. You can always add more but can’t take it away once mixed.
By thoughtfully incorporating flavor enhancers, you can create a cloud cake that’s not only visually appealing but also bursting with deliciousness. Whether you prefer classic, fruity, or spiced variations, these enhancements allow you to personalize your dessert while maintaining its signature lightness.
Baking Techniques for Flawless Results
Setting the Right Oven Temperature
Baking a cloud cake requires precision, and one of the most critical factors in achieving the perfect texture is setting the right oven temperature. The delicate structure of the meringue-based batter means that even slight deviations in temperature can affect the outcome. Here’s everything you need to know about getting the temperature just right:
- Ideal Temperature Range
Cloud cakes typically bake at a lower temperature compared to traditional cakes, usually between 250°F (120°C) and 300°F (150°C) . This slow-and-low approach allows the cake to rise gently without browning too quickly on the outside while remaining soft and airy inside. Refer to your specific recipe for the exact recommended temperature, but stay within this range for optimal results. - Why Low Heat Matters
Egg whites are the backbone of a cloud cake, and they cook more evenly at lower temperatures. High heat can cause the exterior to dry out or brown excessively before the interior has fully set, leading to a dense or cracked cake. A gentle, consistent heat ensures the cake rises uniformly and retains its light, fluffy texture. - Preheating Your Oven
Always preheat your oven before baking. This ensures that the environment is already hot when you place the cake inside, promoting even cooking from the start. Allow your oven to preheat for at least 10–15 minutes to reach the desired temperature. To verify accuracy, consider using an oven thermometer, as built-in thermostats can sometimes be unreliable. - Positioning the Rack
Place the baking dish in the center of the oven, where the heat is most consistent. Avoid placing it too close to the top or bottom heating elements, as this can lead to uneven baking. If your oven tends to have hot spots, rotate the dish halfway through the baking time to ensure even cooking. - Avoiding Common Mistakes
- Opening the Oven Door Too Early: Resist the temptation to check on your cake prematurely. Opening the door during the early stages of baking can cause the cake to collapse due to a sudden drop in temperature. Wait until the final few minutes of baking if you must peek.
- Overcrowding the Oven: Bake only one cloud cake at a time to allow proper airflow around the dish. Overcrowding can trap moisture and prevent the cake from rising properly.
- Adjusting for Altitude
If you live at a high altitude, you may need to adjust the baking temperature slightly. Higher altitudes can cause baked goods to rise faster and dry out more quickly. Consider reducing the temperature by 25°F (about 15°C) and extending the baking time slightly to compensate. - Testing Doneness
To check if your cloud cake is done, gently press the top with your finger. It should spring back lightly without leaving an indentation. Alternatively, insert a toothpick into the center—if it comes out clean or with a few crumbs attached, the cake is ready. Avoid overbaking, as this can result in a dry texture.
By carefully setting and maintaining the right oven temperature, you create the ideal conditions for your cloud cake to achieve its signature lightness and airiness. With these tips, you’ll be well-equipped to troubleshoot common issues and produce a flawless dessert every time.
Timing Your Bake Correctly
Baking a cloud cake requires not only the right temperature but also precise timing. The delicate structure of this dessert means that even a few extra minutes in the oven can lead to overbaking, while underbaking can result in a soggy or unstable texture. Here’s how to time your bake perfectly for a cloud cake that’s light, airy, and evenly cooked:
- Follow Recipe Guidelines
Most cloud cake recipes recommend baking times ranging from 20 to 40 minutes , depending on the size of the dish and the desired level of firmness. Always start with the recommended baking time provided in your recipe as a baseline. Smaller portions, such as individual ramekins, will require less time than a larger cake baked in a single dish. - Start Checking Early
While it’s important to avoid opening the oven door too early (as this can cause the cake to collapse), you should begin checking for doneness about 5–10 minutes before the end of the suggested baking time. This ensures you catch the perfect moment when the cake is fully set without overbaking. - Signs of Doneness
To determine if your cloud cake is ready, look for these key indicators:- Appearance: The top of the cake should appear golden or lightly browned, with a slightly cracked surface. It shouldn’t look pale or overly dark.
- Texture: Gently press the center of the cake with your finger. If it springs back lightly and feels firm to the touch, it’s done. If it leaves an indentation or feels soft, give it a few more minutes.
- Toothpick Test: Insert a toothpick into the center of the cake. When removed, it should come out clean or with a few crumbs attached. If the toothpick is wet or sticky, continue baking for a few more minutes.
- Avoid Overbaking
Overbaking is one of the most common mistakes when making cloud cakes. An overbaked cake will become dry, crumbly, and lose its signature fluffiness. To prevent this, keep a close eye on the cake during the final stages of baking and remove it from the oven as soon as it’s done. - Account for Altitude and Equipment Differences
- High Altitudes: At higher altitudes, cakes tend to bake faster due to lower atmospheric pressure. Reduce the baking time by 5–10 minutes and monitor closely to avoid overbaking.
- Oven Variations: Different ovens heat differently. Convection ovens, for example, may require shorter baking times or lower temperatures. Adjust accordingly based on your specific oven type.
- Let It Cool Properly
Once the cake is baked, resist the urge to serve it immediately. Allow it to cool completely in the dish or transfer it to a wire rack to prevent condensation from forming underneath. Cooling helps stabilize the cake’s structure and enhances its texture. - Troubleshooting Tips
- Underbaked Cake: If the center of the cake is still jiggly or wet, return it to the oven for 3–5 minutes at a time, checking frequently until it’s fully set.
- Overbaked Cake: If the edges are browning too quickly but the center isn’t done, cover the dish loosely with aluminum foil to shield it from direct heat while allowing the interior to finish cooking.
By timing your bake correctly and paying attention to the signs of doneness, you’ll achieve a cloud cake that’s perfectly cooked throughout—light, fluffy, and irresistibly delicious. With practice, you’ll develop a keen sense of timing that ensures consistent results every time.
Common Mistakes to Avoid
While cloud cakes are relatively simple to make, there are a few common mistakes that can ruin the texture or appearance of your dessert. By understanding these pitfalls and how to avoid them, you’ll increase your chances of baking a flawless cloud cake every time. Here are some key issues to watch out for:
- Greasy Mixing Tools
One of the most critical factors in whipping egg whites is ensuring your mixing bowl, whisk, and spatula are completely free of grease or oil. Even a small amount of residue can prevent the egg whites from forming stiff peaks. To avoid this:- Wash all tools thoroughly with warm, soapy water.
- Dry them meticulously with a clean towel or let them air dry.
- If you’re unsure, wipe the bowl with a paper towel dipped in lemon juice or vinegar to neutralize any lingering oils.
- Contaminated Egg Whites
When separating egg whites from yolks, it’s essential to avoid getting even the tiniest bit of yolk into the whites. Yolks contain fat, which can interfere with the whipping process. Use a separate small bowl to crack each egg individually before transferring the whites to your main mixing bowl. This way, if one egg gets broken improperly, it won’t ruin the entire batch. - Overmixing the Batter
Overmixing can deflate the air bubbles trapped in the whipped egg whites, resulting in a dense or flat cake. After folding in sugar, cream of tartar, or other ingredients, stop as soon as everything is evenly combined. Overworking the mixture will cause it to lose its lightness. Remember, a few streaks of unincorporated ingredients are better than overmixing. - Incorrect Oven Temperature
Baking at too high a temperature can cause the outside of the cake to brown quickly while the inside remains undercooked. Conversely, baking at too low a temperature may lead to uneven rising or prolonged cooking times. Always preheat your oven to the correct temperature (usually between 250°F–300°F or 120°C–150°C) and use an oven thermometer to ensure accuracy. - Opening the Oven Too Early
Opening the oven door during the early stages of baking can cause the cake to collapse due to a sudden drop in heat. Wait until the final 10–15 minutes of baking to check on the cake. If necessary, rotate the dish halfway through to ensure even cooking, but avoid frequent interruptions. - Not Allowing Enough Cooling Time
Removing the cake from the oven and serving it immediately can cause it to become soggy or lose its structure. Allow the cake to cool completely in the dish or transfer it to a wire rack to prevent condensation from forming underneath. Proper cooling helps stabilize the delicate texture. - Using Stale Ingredients
Fresh ingredients are crucial for achieving the best results. Old or stale eggs may not whip as well, and expired baking powder or cream of tartar could fail to provide the necessary lift. Always check expiration dates and replace any questionable ingredients. - Adding Too Much Liquid
Incorporating too much liquid, such as condensed milk or fruit puree, can weigh down the meringue and prevent the cake from rising properly. Stick to the recipe’s recommended amounts and adjust cautiously if experimenting with variations. Start with smaller quantities and taste-test as you go. - Skipping the Cream of Tartar
Cream of tartar plays a vital role in stabilizing the meringue and enhancing its structure. Omitting it or substituting improperly can result in a less stable batter. If you don’t have cream of tartar, use a small amount of lemon juice or white vinegar instead, but be aware that these alternatives may slightly alter the flavor. - Underbaking or Overbaking
Both underbaking and overbaking can ruin the texture of your cloud cake. Underbaked cakes may feel soft or jiggly in the center, while overbaked ones become dry and crumbly. Follow the recipe’s suggested baking time closely and check for doneness using the toothpick test or by gently pressing the surface.
By being mindful of these common mistakes and taking steps to avoid them, you’ll significantly improve your chances of creating a perfect cloud cake. With practice and attention to detail, you’ll master the art of baking this light, airy dessert.
Serving and Storing Your Cloud Cake
Creative Ways to Serve Cloud Cake
While a plain cloud cake is undeniably delicious, adding creative toppings, pairings, or presentation ideas can take this dessert to the next level. Whether you’re hosting a special occasion or simply treating yourself, here are some inspiring ways to serve your cloud cake:
- Fruit Toppings for Freshness
Fresh fruits are a classic and colorful way to enhance the flavor and appearance of your cloud cake. Try:- Sliced strawberries, raspberries, or blueberries for a burst of sweetness and color.
- Kiwi slices or mango chunks for tropical flair.
- A drizzle of berry coulis or fruit compote for added depth. For an extra touch, sprinkle a bit of powdered sugar over the top for a light dusting.
- Chocolate Delights
Chocolate pairs beautifully with the airy texture of cloud cake. Consider:- Drizzling melted dark, milk, or white chocolate in zigzag patterns across the top.
- Adding chopped chocolate shavings or curls for a decorative finish.
- Sandwiching layers of cloud cake with chocolate ganache for a decadent treat.
- Whipped Cream and Caramel
For a rich and creamy twist, layer your cloud cake with freshly whipped cream or caramel sauce. These additions add moisture and indulgence:- Spread a thin layer of whipped cream on top or pipe it into swirls for a professional look.
- Drizzle salted caramel sauce for a sweet-and-salty contrast.
- Nutty Accents
Incorporating nuts not only adds crunch but also complements the lightness of the cake. Try:- Sprinkling crushed almonds, pecans, or hazelnuts around the edges.
- Folding finely ground nuts into the batter for subtle flavor enhancement.
- Adding a dollop of nut butter (like peanut or almond) alongside the cake.
- Coconut and Tropical Flair
Coconut is a natural partner for cloud cakes, bringing warmth and exotic vibes:- Top the cake with toasted shredded coconut for texture and aroma.
- Mix in a hint of coconut extract when preparing the batter.
- Pair the cake with fresh pineapple or passionfruit for a tropical twist.
- Seasonal Variations
Customize your cloud cake according to the season for a festive touch:- In winter, add spices like cinnamon, nutmeg, or ginger, and serve with spiced poached pears.
- During summer, use juicy peaches, cherries, or watermelon as toppings.
- For fall, incorporate pumpkin puree or maple syrup into the recipe and garnish with candied pecans.
- Individual Portions
Instead of baking one large cake, try making individual cloud cakes in ramekins or muffin tins. This approach allows guests to choose their own toppings and makes for an elegant presentation at parties or gatherings. - Pairing Suggestions
Enhance the experience by pairing your cloud cake with complementary beverages:- Serve it with a warm cup of coffee or tea for an afternoon delight.
- Pair it with chilled milk or hot cocoa for a comforting treat.
- Offer it alongside sparkling wine or champagne for a celebratory touch.
- Edible Garnishes
Add visual appeal with edible decorations:- Use flower-shaped cookie cutters to create intricate designs out of fruit slices.
- Dust the cake with matcha powder or cocoa powder for a minimalist yet striking look.
- Pipe small rosettes of frosting or whipped cream around the edges.
By experimenting with these creative serving ideas, you can transform your cloud cake into a show-stopping dessert that delights both the eyes and taste buds. Don’t be afraid to mix and match flavors, textures, and presentations to make each serving unique. Let your creativity shine and enjoy the process of elevating this already heavenly treat!
Storage Tips for Maximum Freshness
Cloud cakes are delicate by nature, so proper storage is essential to preserve their light, airy texture and prevent them from becoming soggy or stale. Whether you’re storing leftovers or preparing the cake in advance, following these tips will help keep your dessert fresh and delicious for as long as possible.
- Cool Completely Before Storing
Allow your cloud cake to cool completely before wrapping or placing it in a container. If stored while still warm, condensation can form inside the packaging, leading to a soggy texture. Transfer the cake to a wire rack and let it sit at room temperature until no longer warm to the touch. - Choose the Right Container
Use an airtight container or resealable plastic bag to store your cloud cake. This prevents moisture from the air from affecting the cake and keeps out odors from the refrigerator. Ensure the container is large enough to hold the cake without squishing it, which could compromise its structure. - Refrigerate for Short-Term Storage
Cloud cakes can be stored in the refrigerator for up to 2–3 days. Place the cake in the airtight container and position it on a shelf where it won’t get jostled around. Avoid storing it near strong-smelling foods, as the cake may absorb odors. When ready to serve, remove it from the fridge about 30 minutes beforehand to allow it to come to room temperature for optimal texture. - Freeze for Long-Term Preservation
For longer storage, freezing is the best option. Wrap individual slices or the whole cake tightly in plastic wrap, then place it in a freezer-safe bag or container. Label the package with the date and freeze for up to 2–3 months. To thaw, transfer the cake to the refrigerator overnight rather than leaving it at room temperature, which can cause condensation. - Avoid Overcrowding
If storing multiple layers or slices, separate them with sheets of parchment paper to prevent sticking. Overcrowding can also lead to uneven thawing or damage to the delicate structure of the cake. - Minimize Toppings Before Storing
If your cloud cake has perishable toppings like fresh fruit, whipped cream, or caramel sauce, consider adding these just before serving. These elements can become soggy or lose their appeal when stored alongside the cake. Alternatively, store toppings separately and assemble the cake right before presentation. - Revive Stale Cake (If Necessary)
If your cloud cake has lost some of its freshness, you can revive it by briefly reheating it in the oven. Place the cake on a baking sheet and warm it at 250°F (120°C) for 5–10 minutes. This helps restore some of its original texture, though it may not be as light as freshly baked. - Check for Signs of Spoilage
Always inspect your cloud cake before serving. Discard any portions that show signs of mold, unusual odors, or off flavors. While cloud cakes are relatively stable due to their low moisture content, they are still susceptible to spoilage if improperly stored.
By following these storage tips, you can extend the life of your cloud cake and ensure it remains as fresh and delicious as the day it was baked. With careful handling and proper preservation, you’ll be able to enjoy this heavenly treat whenever the craving strikes!
Portion Sizes for Sharing
Cloud cakes are not only delicious but also visually appealing, making them a great choice for sharing with family and friends. However, due to their delicate nature, cutting and serving cloud cake requires some care to ensure each slice retains its light, airy texture. Here are tips for portioning your cloud cake perfectly:
- Choose the Right Cutting Tool
A sharp knife is essential for slicing through the soft, fluffy texture of a cloud cake without squishing it. Alternatively, use a serrated knife for clean cuts that minimize pressure on the cake. For individual servings baked in ramekins or muffin tins, simply unmold each portion carefully using a small offset spatula. - Determine Serving Size Based on Occasion
- Casual Snacks: For informal gatherings or afternoon treats, smaller slices (about 2–3 inches wide) work well. This allows everyone to enjoy a bite-sized piece without feeling overly indulgent.
- Special Occasions: At events like birthdays or holidays, consider larger slices (about 4–5 inches wide) to make the dessert more substantial and satisfying. You can also serve individual cloud cakes baked in ramekins for a personalized touch.
- Tasting Portions: If offering multiple flavors or variations, provide tiny slivers or mini portions so guests can sample each one without filling up too quickly.
- Technique for Clean Cuts
To avoid compressing the cake, use a gentle sawing motion when slicing instead of pressing down forcefully. Wipe the knife clean between cuts to prevent crumbs from transferring between slices. For added precision, chill the cake slightly before cutting—it firms up the structure, making it easier to handle. - Individual Servings Made Easy
Baking cloud cake in smaller vessels like ramekins or silicone molds eliminates the need for slicing altogether. Each guest receives their own perfectly portioned dessert, which stays intact and looks impressive. Plus, individual servings are ideal for parties where people may want different toppings or flavors. - Plating Ideas for Presentation
Once sliced, arrange the portions attractively on plates or dessert stands. Add garnishes such as fresh fruit, chocolate shavings, or whipped cream to enhance both flavor and aesthetics. For a rustic touch, serve slices directly on wooden boards or slate platters. - Adjust Recipe Quantities for Group Sizes
When baking for a crowd, scale up your recipe accordingly. Doubling or tripling the ingredients ensures there’s enough cake for everyone. Alternatively, prepare several smaller batches with varying flavors or toppings to cater to diverse preferences. - Encourage Self-Serve Options
At buffets or casual gatherings, set out pre-sliced portions alongside serving utensils and toppings. Guests can customize their slices with syrups, nuts, or other add-ons, adding an interactive element to the dessert experience.
By considering portion sizes and employing careful cutting techniques, you can share your cloud cake beautifully while preserving its signature lightness. Whether served as individual treats or elegant slices, this heavenly dessert is sure to delight every palate!
Variations and Customizations
Vegan Cloud Cake Alternative
For those following a vegan lifestyle, creating a cloud cake that’s free from animal products might seem challenging at first. However, with some clever substitutions and modern techniques, you can achieve a cloud cake that’s every bit as light, fluffy, and delicious as its non-vegan counterpart. Here’s how to make a stunning vegan cloud cake:
- Replacing Eggs with Aquafaba
The secret to a vegan cloud cake lies in using aquafaba—the liquid from canned chickpeas or other legumes—as a substitute for egg whites. Aquafaba mimics the properties of egg whites when whipped, forming stiff peaks and providing the necessary structure for your cake. For each egg white called for in the recipe, use about 3 tablespoons of aquafaba. - Choosing the Right Sweetener
Traditional cloud cakes rely on granulated sugar, but there are plenty of vegan-friendly sweeteners you can use instead:- Coconut Sugar: Adds a subtle caramel-like flavor while dissolving easily into the meringue.
- Maple Syrup or Agave Nectar: These liquid sweeteners work well if used sparingly, though they may slightly alter the texture. Use them in combination with powdered sugar for balance.
- Stevia or Erythritol: Zero-calorie options that dissolve quickly and won’t affect the texture of the meringue.
- Substituting Condensed Milk (If Used)
Many cloud cake recipes incorporate sweetened condensed milk for added richness. To make this ingredient vegan-friendly, try one of these alternatives:- Coconut Cream: Whipped coconut cream provides a creamy, tropical twist and pairs beautifully with the light texture of the cake.
- Oat Milk-Based Condensed Milk: Some brands now offer plant-based condensed milk made from oat milk, which works perfectly in baking.
- Homemade Vegan Condensed Milk: Combine plant-based milk (such as almond, soy, or oat) with a thickener like cornstarch and sweetener of your choice. Heat gently on the stove until it thickens.
- Enhancing Flavor Without Dairy
Even without dairy, you can still create rich and flavorful cloud cakes by experimenting with these ideas:- Vanilla Extract or Bean Paste: Adds warmth and depth without relying on butter or cream.
- Nut Butters: Fold in a small amount of almond or cashew butter for a nutty, indulgent taste.
- Matcha or Cocoa Powder: Sift matcha or cocoa powder into the batter for vibrant color and bold flavor.
- Tips for Success
- Whip Aquafaba Thoroughly: Like egg whites, aquafaba needs to be whipped until stiff, glossy peaks form. This process may take longer than with eggs, so be patient.
- Add Cream of Tartar: Just as in traditional recipes, adding a pinch of cream of tartar helps stabilize the meringue and enhances its structure.
- Avoid Overmixing: Whether folding in sugar or other ingredients, handle the mixture gently to prevent deflating the air bubbles.
- Baking Adjustments
- Check Doneness Carefully: Vegan cloud cakes may bake slightly differently due to the absence of eggs. Monitor closely during the final minutes of baking and use the toothpick test to ensure doneness.
- Cool Completely Before Serving: Allowing the cake to cool fully helps set its delicate structure, whether made with aquafaba or other substitutes.
- Toppings and Pairings
Vegan cloud cakes pair beautifully with a variety of plant-based toppings:- Fresh fruit such as berries, mangoes, or kiwis.
- Coconut whipped cream or dairy-free yogurt for added richness.
- Chocolate ganache made with dark chocolate and coconut milk for a decadent finish.
By embracing these simple swaps and techniques, you can craft a vegan cloud cake that rivals any traditional recipe in terms of flavor, texture, and presentation. Whether you’re catering to dietary preferences or simply exploring new culinary horizons, this delightful dessert is sure to impress!
Low-Calorie Version
For those looking to indulge in a cloud cake without the guilt, creating a low-calorie version is easier than you might think. By making smart ingredient swaps and adjustments, you can enjoy this heavenly dessert while keeping your calorie count in check. Here’s how to craft a deliciously light and airy low-calorie cloud cake:
- Using Sugar Substitutes
One of the biggest contributors to the calorie content of a cloud cake is sugar. To reduce the calorie count, consider using alternative sweeteners:- Stevia or Erythritol: These zero-calorie sweeteners dissolve easily into the meringue and won’t affect its texture. Use them in powdered form for best results.
- Monk Fruit Sweetener: Another excellent zero-calorie option that mimics the sweetness of sugar without adding extra calories.
- Allulose: A natural, low-calorie sweetener that behaves similarly to sugar when baked but has minimal impact on blood sugar levels.
- Reducing Fat Content
If your recipe includes ingredients like condensed milk or butter, you can significantly cut calories by reducing or replacing these elements:- Coconut Cream Alternative: Instead of using sweetened condensed milk, try blending coconut cream with a touch of vanilla extract and stevia for a lower-calorie substitute.
- Plant-Based Milks: Opt for unsweetened almond, oat, or soy milk instead of heavier creams. These options add moisture without excess fat or calories.
- Egg Whites Only
Cloud cakes already rely heavily on egg whites, which are naturally low in calories and high in protein. By sticking to egg whites and avoiding yolks, you’re already on track for a lighter dessert. Ensure the egg whites are whipped thoroughly to maximize their volume and airiness. - Adding Flavor Without Calories
Enhance the taste of your cloud cake without adding extra calories by incorporating these flavor boosters:- Extracts and Zests: Vanilla extract, almond extract, lemon zest, or orange zest add vibrant flavors without contributing significant calories.
- Spices: Cinnamon, nutmeg, or cardamom provide warmth and complexity while being virtually calorie-free.
- Herbal Infusions: Matcha powder or dried herbs like mint can lend unique flavors to your cake.
- Minimizing Toppings
While toppings like whipped cream, chocolate drizzles, and caramel sauce are tempting, they can quickly increase the calorie count. Opt for lighter alternatives:- Fresh Fruit: Berries, kiwi slices, or mango chunks add natural sweetness and color without piling on the calories.
- Dairy-Free Whipped Cream: Make your own using coconut cream or aquafaba for a creamy finish with fewer calories.
- Cocoa Dusting: A light sprinkle of unsweetened cocoa powder adds a hint of chocolate flavor without the added sugar.
- Baking Adjustments
- Smaller Portions: Bake individual cloud cakes in ramekins or mini muffin tins to control portion sizes and reduce overall calorie intake.
- Shorter Baking Time: Reducing the baking time slightly may result in a softer, more delicate texture that feels more indulgent despite being lower in calories.
- Tips for Success
- Whip Thoroughly: Properly whipped egg whites (or aquafaba) are key to achieving the lightness that makes cloud cakes so satisfying, even when made with fewer calories.
- Test for Doneness: Since some sugar substitutes may affect browning, rely on the toothpick test or gentle touch to ensure your cake is fully baked.
By focusing on smart ingredient choices and mindful preparation techniques, you can create a cloud cake that delivers all the joy of the original while keeping calories in check. Whether enjoyed as a guilt-free treat or part of a balanced diet, this low-calorie version is sure to satisfy your sweet tooth!
Adding Unique Flavors
While the classic cloud cake is undeniably delightful, adding unique flavors can elevate this dessert to new heights. Whether you’re inspired by seasonal ingredients, international cuisines, or simply want to experiment with bold tastes, here are some creative ideas for infusing your cloud cake with unforgettable flavor profiles.
- Herbal Infusions
Herbs bring a refreshing twist to cloud cakes, offering subtle yet distinctive aromas:- Lavender: Add a teaspoon of dried culinary lavender for a floral, calming note that pairs beautifully with vanilla or honey.
- Mint: Stir in finely chopped fresh mint leaves or a few drops of peppermint extract for a cool, refreshing finish.
- Rosemary: For a savory-sweet take, fold in minced rosemary and pair with citrus zest for balance.
- Spiced Variations
Warm spices add depth and complexity to your cloud cake, making it perfect for fall or winter gatherings:- Pumpkin Spice: Combine ground cinnamon, nutmeg, ginger, and cloves, then mix a small amount into the batter for a cozy autumn vibe.
- Cardamom: This aromatic spice adds an exotic touch—use it alone or paired with citrus flavors like orange or lemon.
- Chai-Inspired: Mix chai tea powder or a blend of spices (cinnamon, cardamom, cloves) into the batter for a spiced tea-inspired treat.
- Citrus Zest and Juices
Citrus fruits lend brightness and tanginess to cloud cakes, balancing their sweetness perfectly:- Lemon Lavender: Sift powdered sugar mixed with lemon zest into the batter, then sprinkle dried culinary lavender on top before baking.
- Orange Blossom: Add a teaspoon of orange blossom water for a fragrant, Middle Eastern-inspired flavor.
- Grapefruit Twist: Use grapefruit zest and a splash of juice for a zesty, slightly bitter contrast.
- Matcha and Tea-Inspired Flavors
Incorporating tea powders or extracts can give your cloud cake an elegant, sophisticated edge:- Matcha Green Tea: Sift matcha powder into the batter for a vibrant green hue and earthy, slightly bitter taste.
- Earl Grey: Steep Earl Grey tea leaves in warm plant-based milk, then strain and fold the infused liquid into the batter.
- Black Tea: Brew strong black tea, let it cool, and use it as a substitute for part of the liquid in your recipe.
- Nutty Undertones
Nuts not only enhance texture but also contribute rich, nutty flavors:- Almond Joy: Fold almond extract and finely ground almonds into the batter for a sweet, toasted aroma.
- Hazelnut Delight: Add hazelnut liqueur or pure hazelnut butter for a Ferrero Rocher-like experience.
- Pistachio Bliss: Use pistachio paste or finely chopped pistachios for a vibrant green color and nutty flavor.
- Fruit Purees and Compotes
Fresh or cooked fruit adds natural sweetness and a pop of color:- Berry Bliss: Gently fold raspberry, blueberry, or strawberry puree into the batter for bursts of fruity flavor.
- Passionfruit Punch: Strain passionfruit pulp and stir it into the mixture for a tropical twist.
- Apple Cinnamon: Mix grated apple and a pinch of cinnamon for a comforting, pie-inspired flavor.
- Savory Options
Don’t be afraid to think outside the box with savory cloud cakes:- Cheese and Herb: Fold in finely grated Parmesan cheese and chopped herbs like thyme or oregano for a salty, aromatic treat.
- Caramelized Onion: Pair caramelized onions with a drizzle of balsamic glaze for a sophisticated appetizer-style cloud cake.
- Smoked Paprika: Add a pinch of smoked paprika for a smoky, savory kick.
- Tips for Success
- Start Small: Begin with minimal amounts of flavorings and adjust gradually to avoid overpowering the delicate meringue base.
- Fold Gently: When incorporating liquids or powders, do so carefully to prevent deflating the air bubbles in the whipped egg whites.
- Balance Sweetness: If using strong or bitter flavors like matcha or citrus, ensure the sweetness level is adjusted accordingly for harmony.
By experimenting with these unique flavor combinations, you can transform your cloud cake into a truly one-of-a-kind dessert. Let your creativity shine and discover which flavors resonate most with your palate—or impress your guests with something unexpected!
Conclusion
Cloud cakes are more than just desserts—they’re an experience. With their light, airy texture and customizable flavors, these heavenly treats offer endless possibilities for creativity in the kitchen. Whether you’re a seasoned baker or just starting out, mastering the art of making cloud cakes is both rewarding and fun.
From whipping egg whites to perfection to experimenting with unique flavor combinations, every step of this recipe teaches valuable baking skills while delivering delicious results. And with options like gluten-free, vegan, and low-calorie variations, there’s truly something for everyone to enjoy.
Remember, practice makes perfect when it comes to baking cloud cakes. Don’t be discouraged if your first attempt isn’t exactly how you envisioned—it’s all part of the learning process. Over time, you’ll develop confidence in achieving that signature fluffiness and creating stunning presentations worthy of any celebration.
So go ahead, gather your ingredients, preheat your oven, and let your imagination take flight. Share your creations with loved ones, savor each bite, and revel in the joy of crafting something so simple yet extraordinary. Happy baking!